Yeastar's PBX allows for a fairly simple configuration of SIP trunks via its web interface. Twilio has been tested and confirmed as compatible with the Yeastar platform. We will go over the process of configuring your Twilio SIP trunk with your Yeastar PBX below.
1) First, you will want to log in to your PBX and select the settings icon, this will bring up a sub-menu of settings. From here we will be selecting trunks.
 \
\
2) From here we will be adding a trunk. This can be done by selecting the Add button under the trunks sub-menu. Any other trunks that are in place will also be listed here.

3) Once you have purchased a number from CloudCo Partner to use with Twilio, we will provide you with the information needed for your first setup. You will be setting up the trunk as a Peer Trunk. We will be providing you with a domain name that you will be entering for both the hostname/ip and domain fields as pictured below. Additionally, if you would like to set up a global caller ID, this will be entered in the caller ID number field. Please note though that the extension's caller ID field will take precedence over this field.
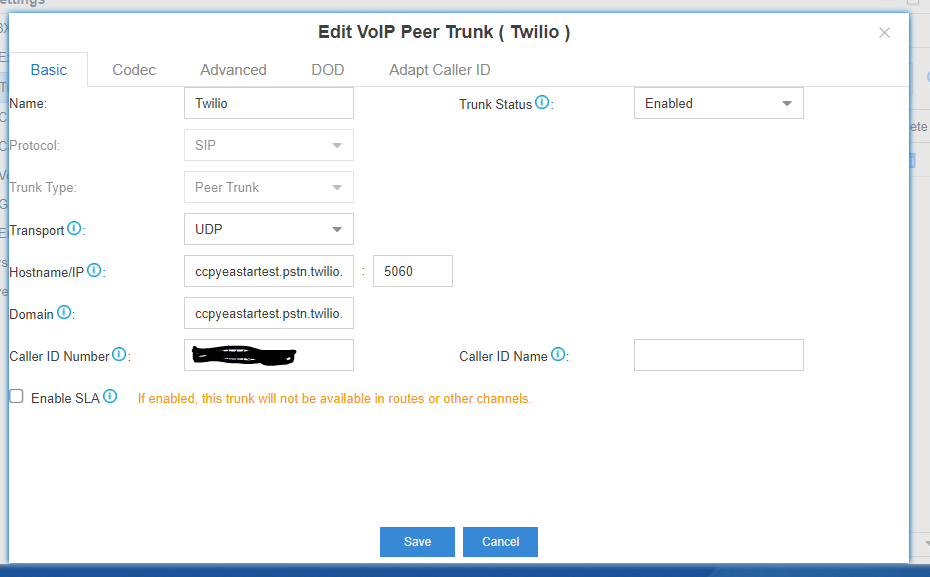
4) Please also take note of the codec tab. You will want to ensure that both u-law(G.711u) and a-law(G.711a) are in the selected codecs field. Twilio makes use of these codecs and to ensure audio passes you will need these codecs enabled.

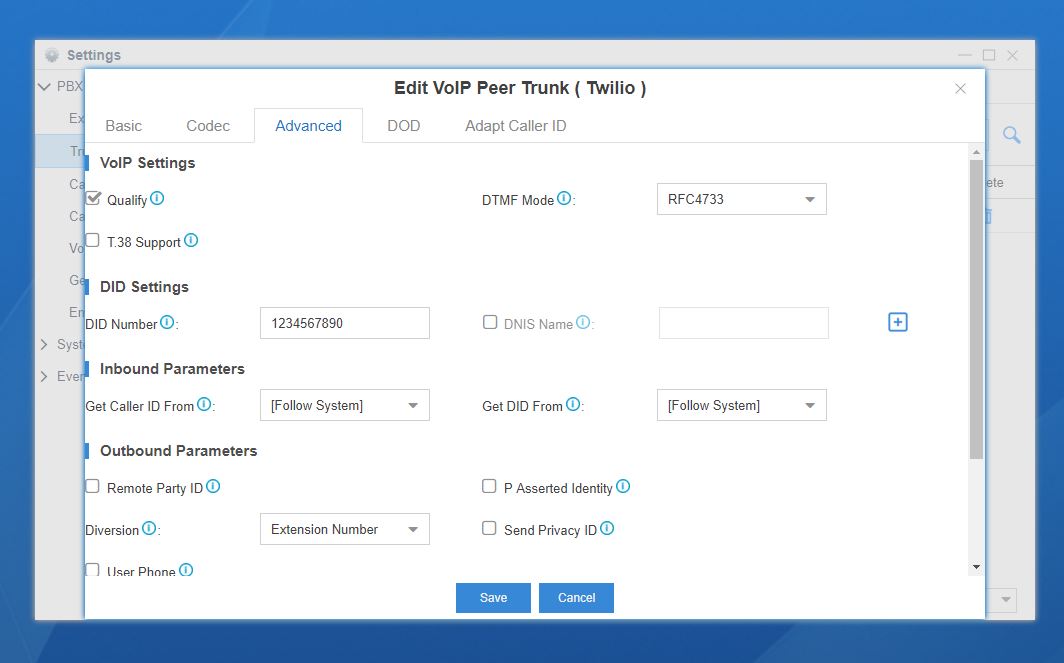
5) Next, navigate to the DID number field. You will need to enter any DID's that you are looking to use with your trunk here. These need to be entered in the format of 1XXXXXXXXXX. You will not need to enter the leading +. In addition there is currently a limit of 15 DID's per trunk. On twilio we can set up multiple trunks if needed to get around this limitation.
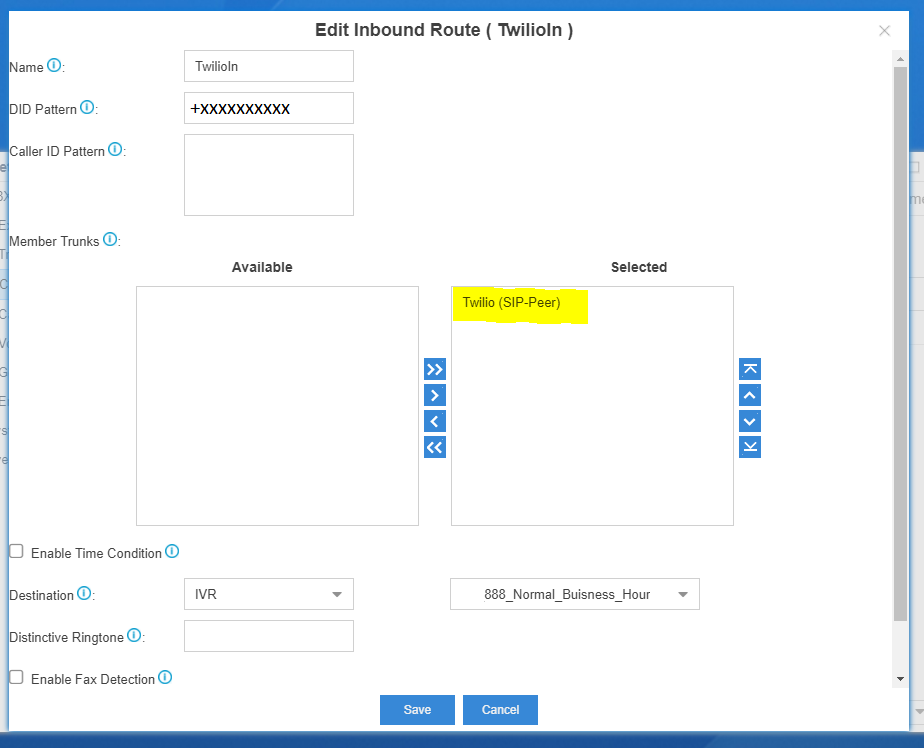
6) Go ahead and save your trunk and proceed to the inbound routes tab, this can be found under the call control menu. We will be selecting the add button here to add a DID and create an according inbound route for that DID.

7) When adding your inbound route, there are several things to take note of. First, the DID pattern has to be in the +1xxxxxxxxxx format. This is the E.164 numbering format which Twilio uses and requires for routing inbound calls. Second, please ensure that you move your trunk you created earlier to the selected part of the trunk and you will want to select a destination to be able to properly test that calls are routing as intended.
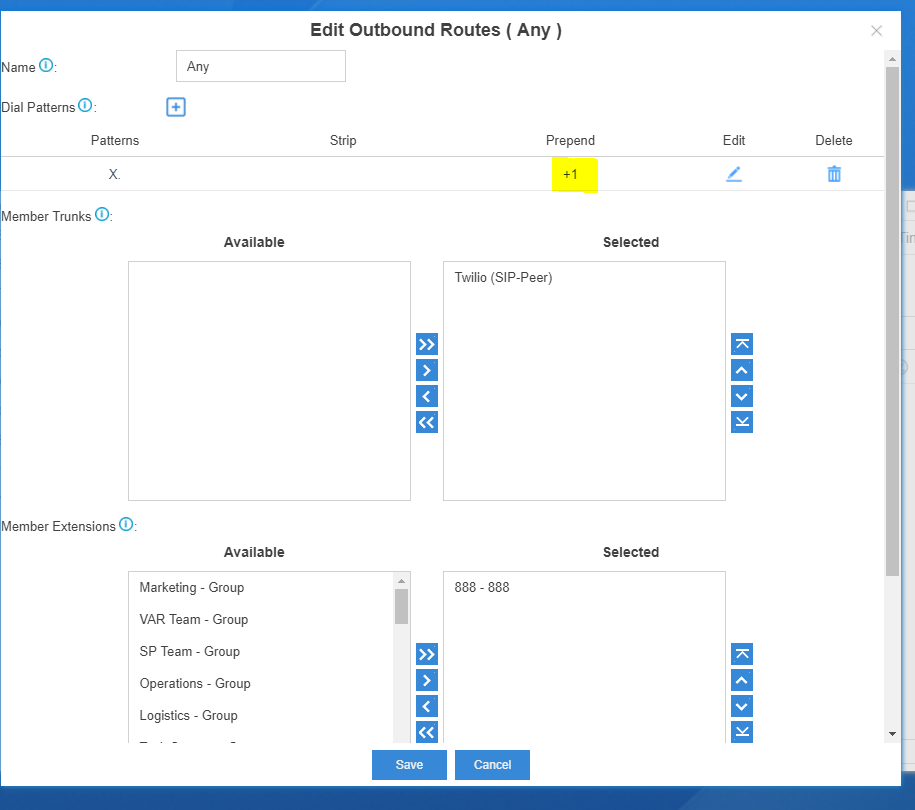
8) Once your settings have been saved, please proceed to the outbound routes tab. Here we will be adding a generic X. rule that will send anything out via your trunk.
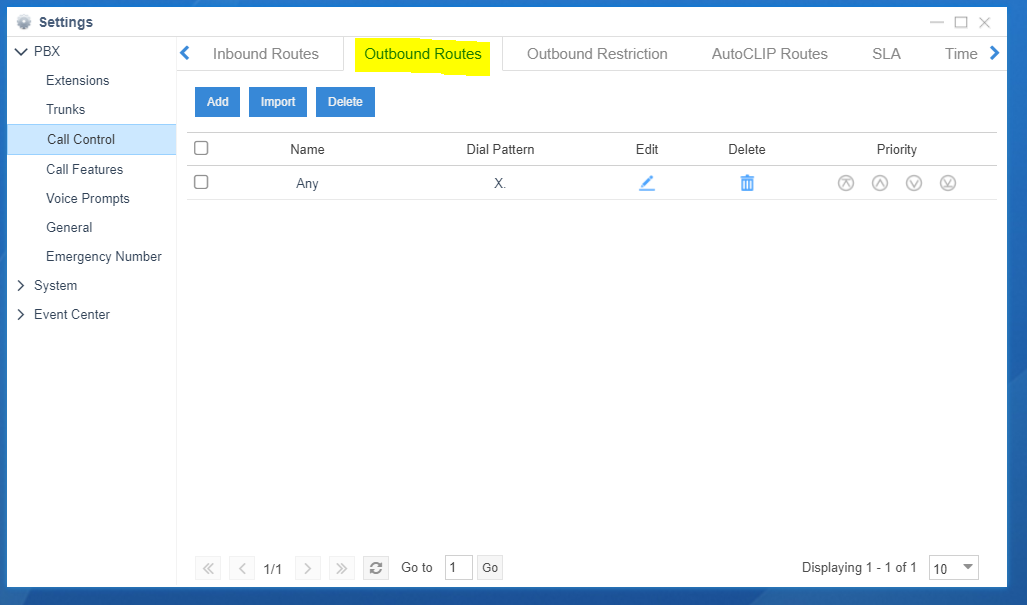
9) When adding any outbound routes, please note that you will need to prepend a +1 to follow E.164 number formatting requirements. Additionally, you will need to select the extensions or groups that will be allowed to dial via this rule. The rule as show below will allow any input dialed to be sent out via your trunk. This can be honed in and crafted to your requirements as needed.
10) If you would like to narrow in your outbound routes, you will need to create specific dial patterns that correspond with the desired rule. For example a generic 10-digit rule would be formatted as XXXXXXXXXX.
Dial Pattern
Outbound calls that match this dial pattern will use this outbound route. There are a number of dial pattern characters that have special meanings:
X : Any Digit from 0-9
Z : Any Digit from 1-9
N : Any Digit from 2-9
[12345-9] : Any digit in the brackets (in this example, 1,2,3,4,5,6,7,8,9)
The ‘.’ Character will match any remaining digits. For example, 9011. will match any phone number that starts with 9011, excluding 9011 itself.
The ‘!’ will match none remaining digits, and causes the matching process to complete as soon as it can be determined that no other matches are possible.
Steve Stoveld
Comments