Overview:
CloudCo Partner SIP trunks have been tested and are functional on FreePBX. In this guide, we will go over the basic configuration of a CloudCo Partner SIP trunk with FreePBX, along with this, we will get simple inbound and outbound call routing set up as well. Prior to the setup below, it will be assumed that you have provided us with the static IP address of your server so we can point the traffic to your server.
Process:
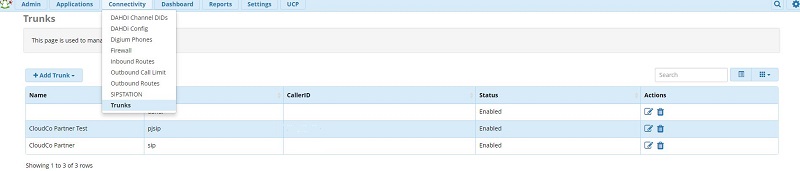
To begin, navigate to the connectivity tab and select trunks. Here you are going to need to select the "+ Add Trunk" button, and select "Add SIP (chan_pjsip) Trunk."
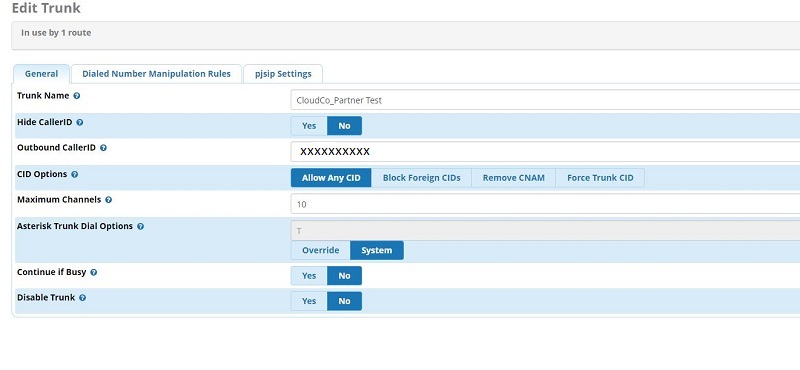
You can also add a "chan_sip" trunk but we will not be covering that setup in this guide. If you would like to go that route, our guide on Setting up a CloudCo SIP Trunk with Elastix would be able to help you get the basic setup done if you went that route. We are only going to be covering the basic setup. First, we will want to enter a name for the SIP trunk, as well as define our outbound caller ID. This will need to be a 10-digit number, presumably the number for your trunk, but could be what you want to define. The rest of the settings will be to your preference.
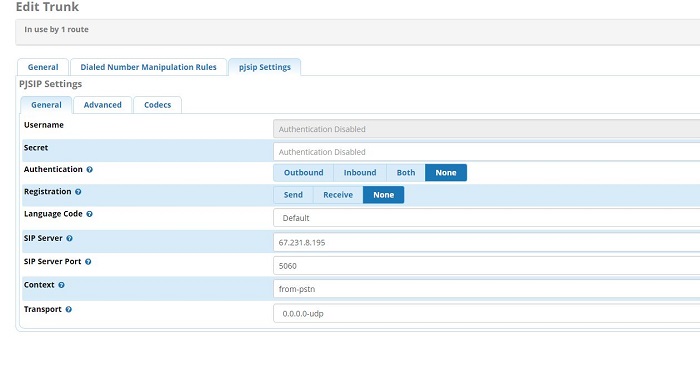
Continue to the pjsip settings tab where you will be presented with the screen shown below. Here you will want to set authentication to none and registration to none. SIP server will be set to the default IP "67.231.8.195" and default SIP server port of 5060. The rest of the settings can be left default or to your preference.
Proceed to the advanced tab. Here you will need to enter the 67.231.8.195 ip in the "from domain" category. All other settings can be left default.

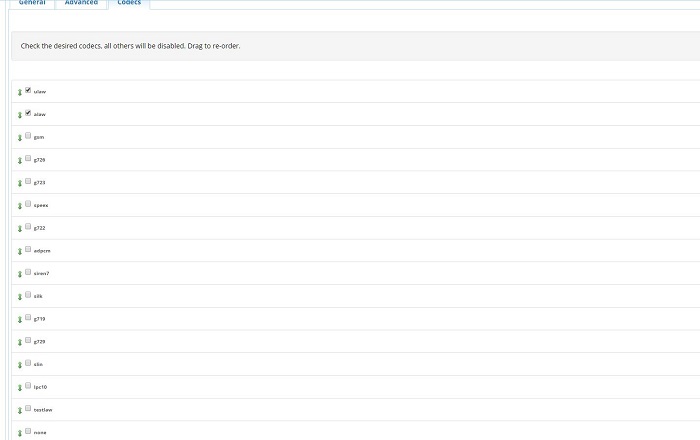
Finally, proceed to the codec's tab. CloudCo Partner supports G.711U/A as well as G.729, if your PBX is licensed for it. In this case, we will be deselecting all other codecs and only leaving ulaw and alaw selected.
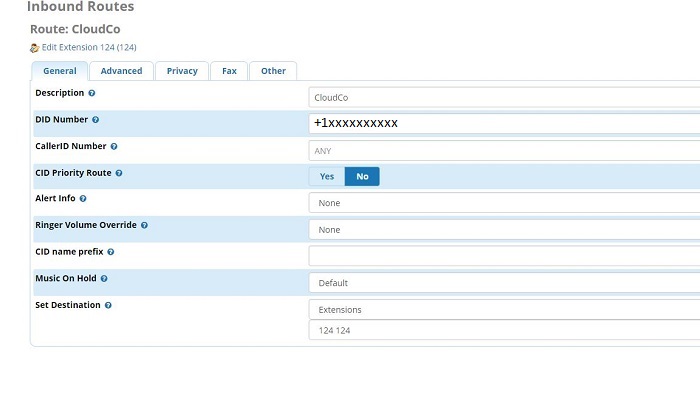
With that complete, you have your SIP trunk added in the most basic of forms. In this state, you won't actually be able to do anything. We will cover some simple inbound and outbound rule setups so you can get some functionality as well. Navigate to the connectivity tab and select inbound routes. Go ahead and select the "+ Add Inbound Route" option. Here you will need to select a destination for your route, as well as define the DID number. CloudCo Partner sends the number into the PBX in the form of +1xxxxxxxxxx so you will need to define your DID in the same fashion. All other settings can be left to your preference.
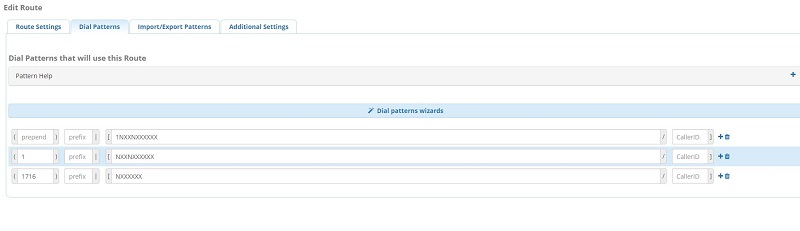
Finally, navigate to connectivity --> outbound routes and select the "+Add Outbound Route" option. Here you will want to name your route and select the trunk to use in the "trunk sequence for matched routes" area

Finally, select dial patterns and enter the following for basic 7,10 and 11 digit dialing. You will need to change the 7-digit rule to 1xxx for your area code.
With this complete, you can apply your configuration. Basic setup is complete and you will be able to make inbound and outbound calls using your CloudCo Sip Trunk.
Steve Stoveld
Comments