Overview:
CloudCo Partner SIP trunks have been tested and are functional on the Grandstream UCM. In this guide, we will go over the basic configuration of a CloudCo Partner SIP Trunk with the Grandstream UCM as well as setting up some simple inbound and outbound routing.
Before you begin: You will need to provide us with the static IP address of your server as our SIP Trunks use a peer (IP Based) authentication. You should have extensions and phones registered with your UCM in order to test phone calls after you add a SIP Trunk and inbound/outbound routes.
Process:
- Log into your UCM (default username and password is admin/admin). If this is your first time logging in, you will be prompted to change the password.
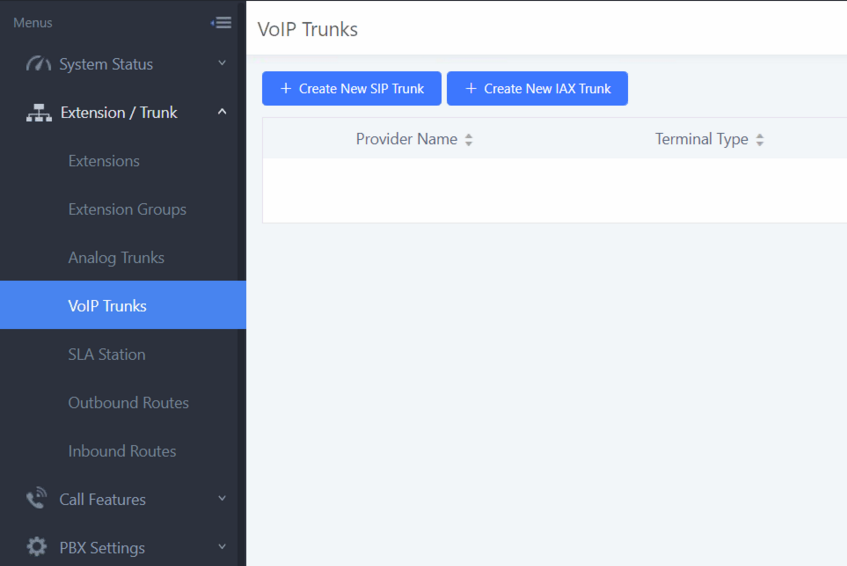
- Navigate to PBX >> Basic/Call Routes >> VoIP Trunks and click "Create New SIP Trunk".
- Below are the registration details you will need to enter:
-
Type MUST be set to Peer SIP Trunk
- Peer SIP Trunks use IP-based authentication and do not require a username or password.
- Register SIP Trunks use username/password authentication.
- Provider Name can be set to anything you prefer - this is to differentiate the different SIP Trunks you may have.
- Host Name MUST be set to 67.231.8.195 - this IP address is our SIP Trunk server and is used to establish connections.
- NAT is optional, however this is an important feature. You may need to enable NAT if your UCM is directly assigned to the public IP address of your network.
- CallerID determines your Caller ID Number on Outbound calls. This will be your phone number that's provided by us.
- CallerID Name determines your Caller ID Name information on Outbound calls.
-
Type MUST be set to Peer SIP Trunk
-

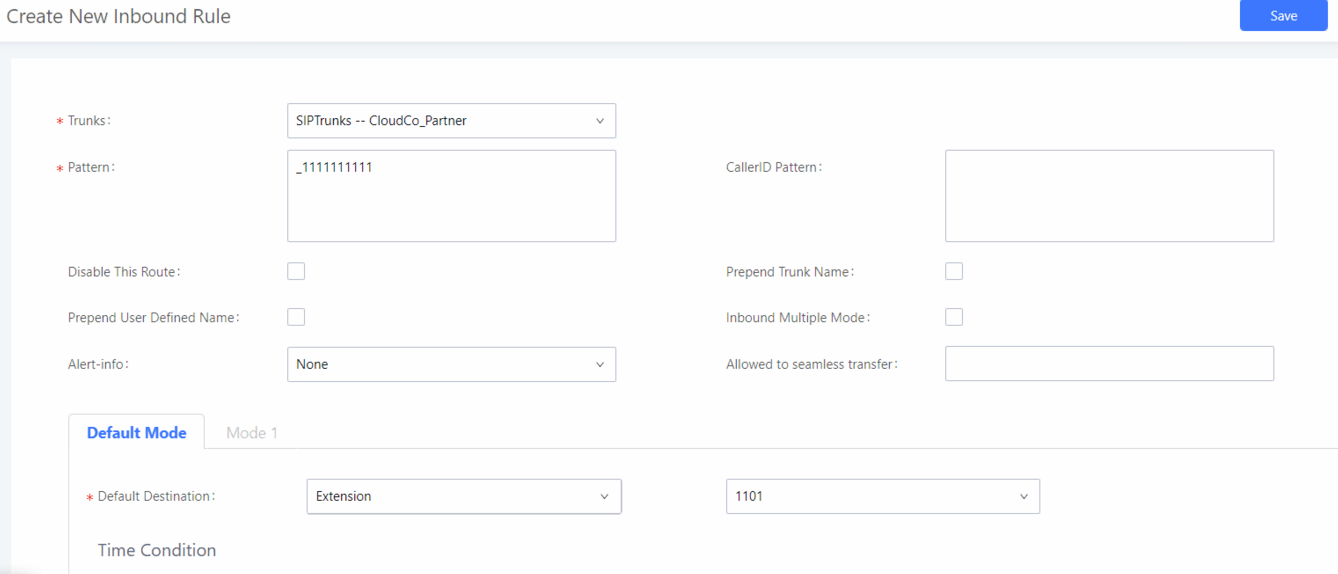
- Now that we have our SIP Trunk setup, we can create some simple inbound and outbound routing rules. First, navigate to PBX >> Basic/Call Routes >> Inbound Routes. Make sure you have the CloudCo Partner SIP trunk you just created selected in the "Trunk" drop down list and click "Create New Inbound Rule". You will need to create a rule for each DID, if you have DID's going to the same destination, you can enter them in the same rule broken apart with a comma.
- Below are the inbound route details you will need to enter:
- Trunks needs to be set to the CloudCo Partner SIP trunk you created earlier.
- Pattern will be the phone number in the required format that's provided by us. Typically you will want to enter this as your 10 digit DID prepended with an _+1 (_+11234567890).
- Default Destination will provide you with options on where you would like to route incoming calls.
-
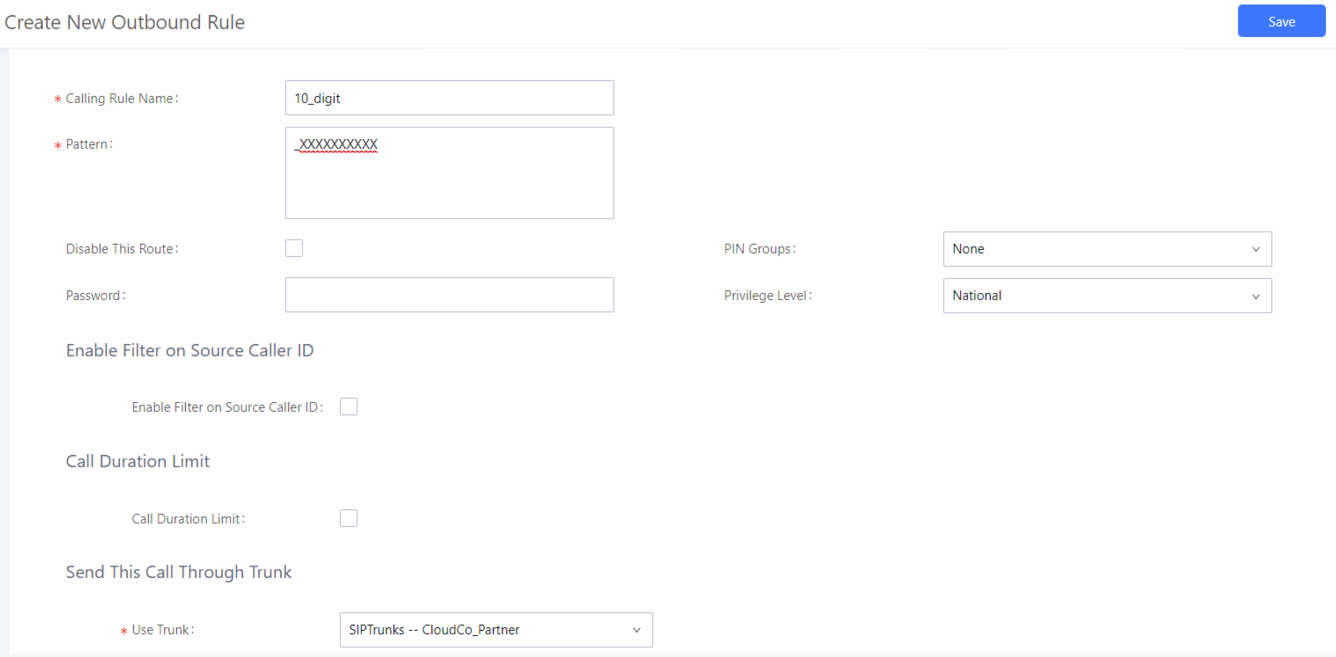
- Next, navigate to PBX >> Basic/Call Routes >> Outbound Routes. You will need to create several routes in order to properly dial out from the system. We will give you an example of a basic 10-digit rule. Typically you will want rules defined for 7-Digit, 10-Digit, 11-digit as well as special emergency cases. Please note that the list of outbound rules is an ordered list so the system will start from the top and work its way down until it hits the first match.
- Below are the outbound route details you will need to enter:
- Config Rule Name is used to distinguish your rules from one another.
- Pattern is the phone number pattern you would like this rule to be applied to. Typically a basic working pattern is lead off with an _ an followed by the number of X's needed. A 10-digit pattern would like this (_XXXXXXXXXX).
- Privelige Level is the level for users/extensions that is needed to be allowed to use this rule. If you leave this at disabled or it does not match up with the level set on the extensions, the system will block you from dialing outbound.
- Use Trunk will need to be set to the CloudCo Partner turnk you created earlier.
- Strip specifies the number of digits that will be removed from the number before the call is placed via the trunk.
-
Prepend specifies the number of digits that will be added to the front of the number before the call is placed via the trunk.
- You'll likely need to prepend a +1 depending upon the rule.
-
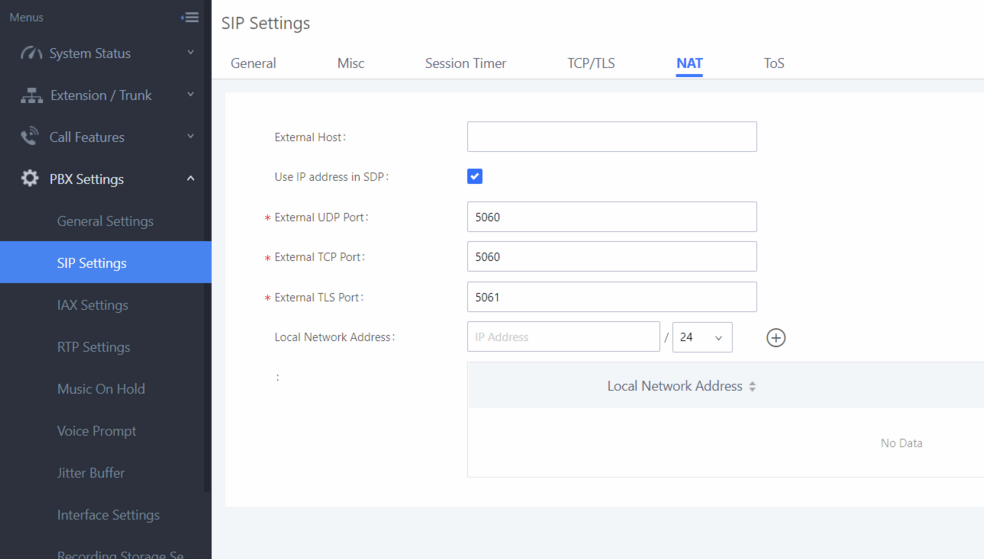
- You may need to perform one addition step. In some cases, users need to define their public IP address in the external host field in the PBX Settings --> SIP Settings --> NAT section on the UCM. This is pictured below. If you have any issues with one-way audio or calls dropping after a short period of time, please define your public IP here and test again.
Steve Stoveld
Comments