Overview:
Cloudco Partner SIP trunks have been tested and are functional on Elastix. In this guide, we will go over the basic configuration of a CloudCo Partner SIP Trunk with Elastix and get simple inbound and outbound routing set up as well. Prior to the setup below, you will have provided us with the static IP address of your server so we can point the traffic to your server.
Process:
To begin, navigate to the PBX page and on the sidebar under basic select trunks. Here you will need to select the "Add SIP Trunk" option. We are only covering basic information in this guide and by default, most of the defaults can be left as is. You will just need to name the trunk and provide the appropriate outbound caller id that you would like to define for your trunk. Please remember that this will need to be a number and not a name. Caller ID name is not handled by your server.
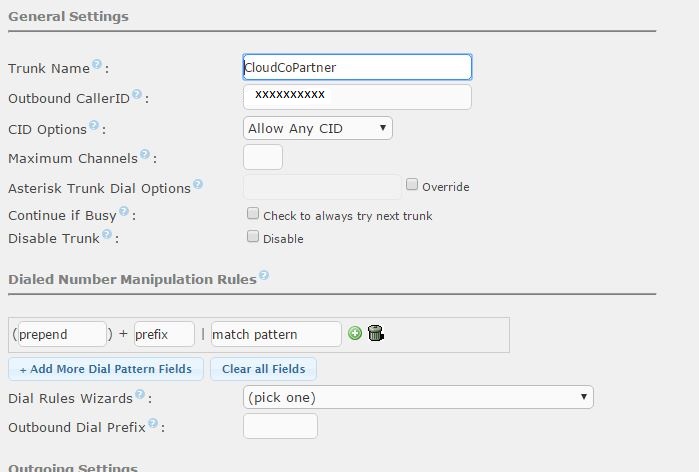
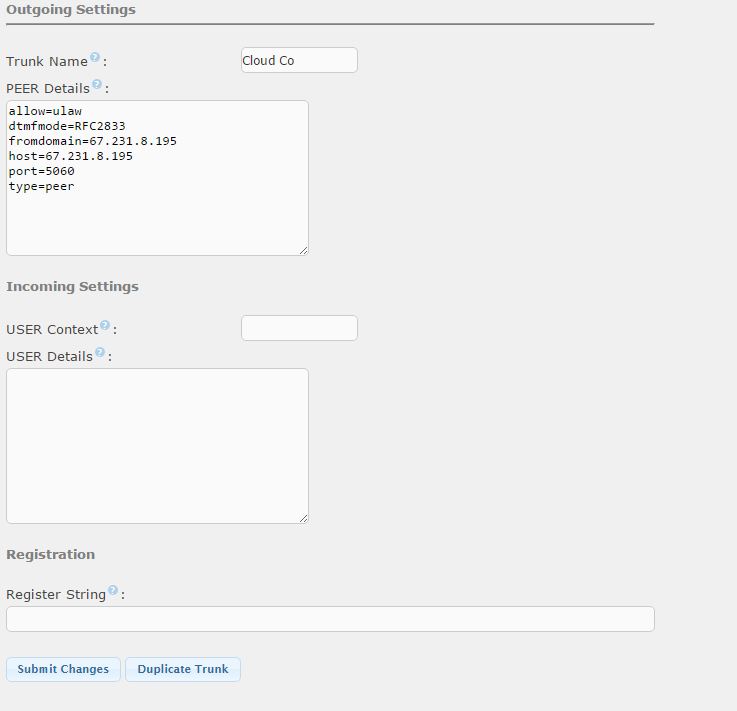
What you will need to provide are the PEER details for the trunk, these define how your trunk operates with Elastix. With CloudCo Partner, you only have to define the PEER details, USER details are not required for functionality. The PEER details are provided below for your convinience, you will only need to change the fromuser field to your number.
allow=ulaw
dtmfmode=RFC2833
fromdomain=67.231.8.195
host=67.231.8.195
nat=( {yes} specified by individual use case)
port=5060
type=peer
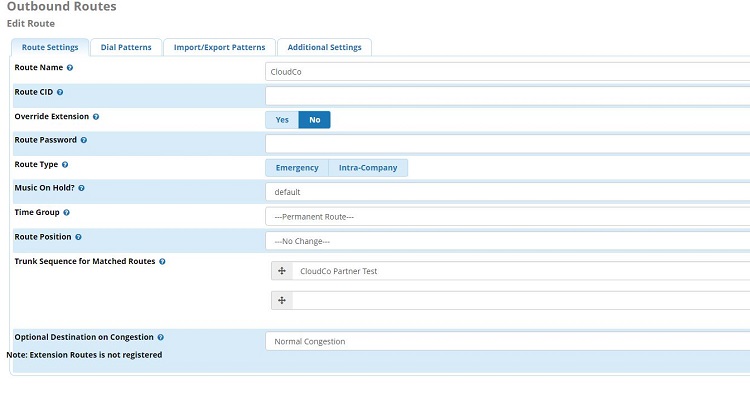
With this complete, your server will be set up to recognize your trunk, but will not have any ability to route calls in or out. Let's first get basic outbound routing setup. This will allow for basic 7,10 and 11 digit dialing. Anything else you will need to set up on your own. Navigate to outbound routes and it should default to a new outbound route page, if not click on add route in the box on the right. Again, you will not need to change too much from the default with this setup. You will want to make sure that you select your trunk in the "Trunk Sequence for Matched Routes" section or these outbound routes will not be applicable for your trunk. Finally, you will just need to substitute your area code for the final 7 digit pattern. Below is a screenshot that shows these basic settings.
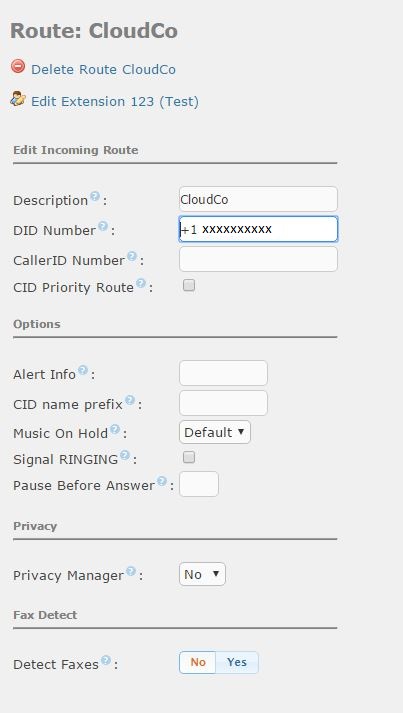
Finally, under inbound call control, navigate to the inbound routes page. Here you will setup your inbound routes. The main thing of note, for your inbound route to work correctly with CloudCo Partner, your DID Number will need to be defined as it is sent for Elastix to recognize the number. In this case, CloudCo Partner is sending the number in this fashion +1XXXXXXXXXX, so you will need to provide the full 11-digit DID with the + for your inbound route to function correctly. Outside of that all other settings are up to personal preference and can be set as you desire.
With these steps complete, you will have a CloudCo Partner SIP Trunk setup with your Elastix server. You will be able to make basic outbound and inbound calls, any additional preferences will need to be set by you.
Steve Stoveld
Comments