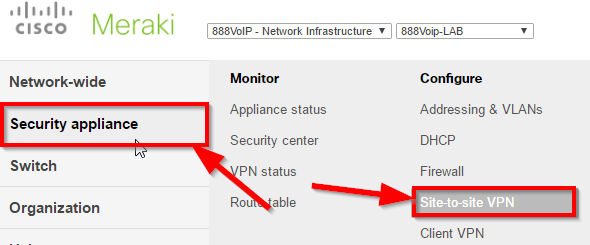
First, we need to configure the 3rd party VPN in Meraki. This needs to be done on both Meraki appliances. In the Meraki portal, select the proper network, then navigate to Security Appliance > Site-to-site VPN.

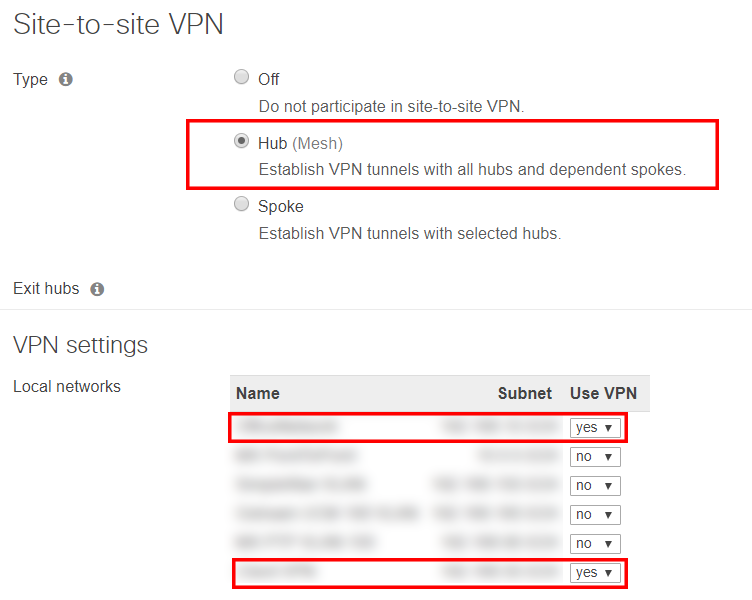
From there, make sure the Type is set to Hub and the local subnets you supplied us earlier are set to Yes.

From there, scroll down until you see Organization-wide settings. Next to the Non-Meraki VPN peers section, fill it out as follows. For the name, you can give it whatever name you like, it does not matter. Public IP will be the IP address we supply for the VPN. Private Subnets will be the subnet of the VPN, which we will also supply, along with the Preshares secret. For availability, this is not required. If your appliances already have a tag, you can use it, otherwise, you can leave this blank.

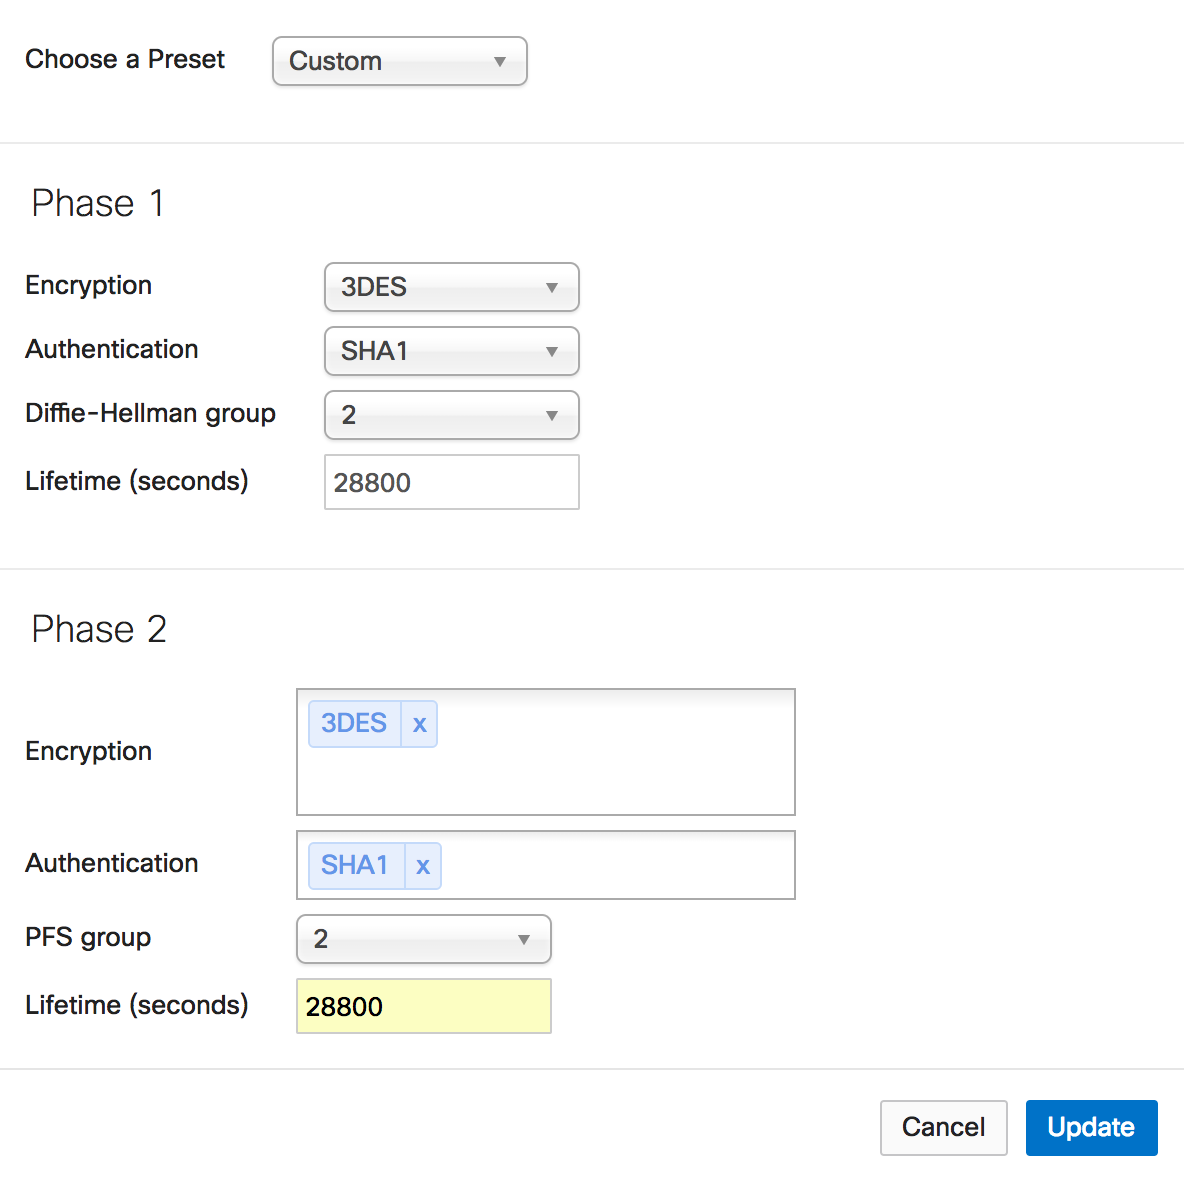
Then click on the link underneath the IPsec policies. If you haven't yet edited the IPsec policies, it should say Default. Otherwise, it should show Custom as it does in the screenshot above.
In the new window that opens up, configure it as follows

All of the above settings MUST match exactly, or the VPN tunnel will fail.
------------------------------
Once the above steps have been completed, please let us know so we can restart the tunnel connection and test to make sure the tunnel is functioning properly. Once we are on the same page, we will need to look at the Meraki Event Log on both Meraki appliances, to make sure that the tunnels have been negotiated successfully.
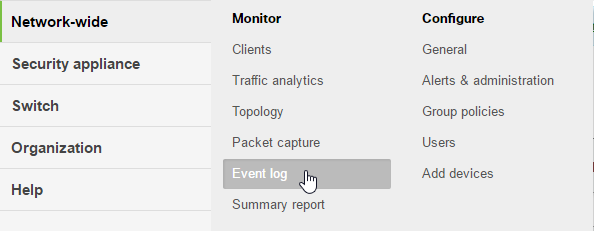
To bring up the event log in Meraki, navigate to Network-wide > Event log.

Once we're in the event log, we're looking for a successful connection message. It should look something like this:
![]()
This is what we want to see. If we are getting other messages under the Non-Meraki / Client VPN negotiation filter, we will need to go back and do some tweaking
Steve Stoveld
Comments