Overview: After you receive your server details you will need to begin the process of setting up your server. One of the first things you will most likely be looking to do, will be setting up your phones to work with 3CX. While this process is overall quite similar to setting up a phone to work with a local server, there are a few steps that are different, due to the server being in the cloud rather than on site.
3CX Set-up Guide: To begin, you will need to go through the steps of creating an extension. Once that is complete, navigate to the phone provisioning tab in that extension.

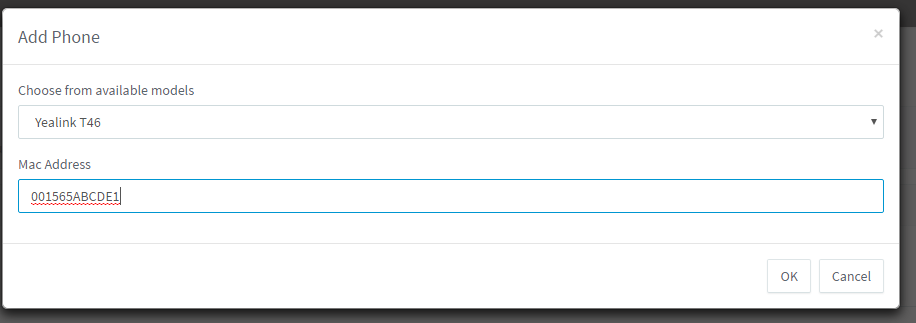
Here, you will need to click +Add. A pop up will appear asking you to select a template and then to define your MAC address. Templates will only exist for supported devices and any custom templates that you may have imported.
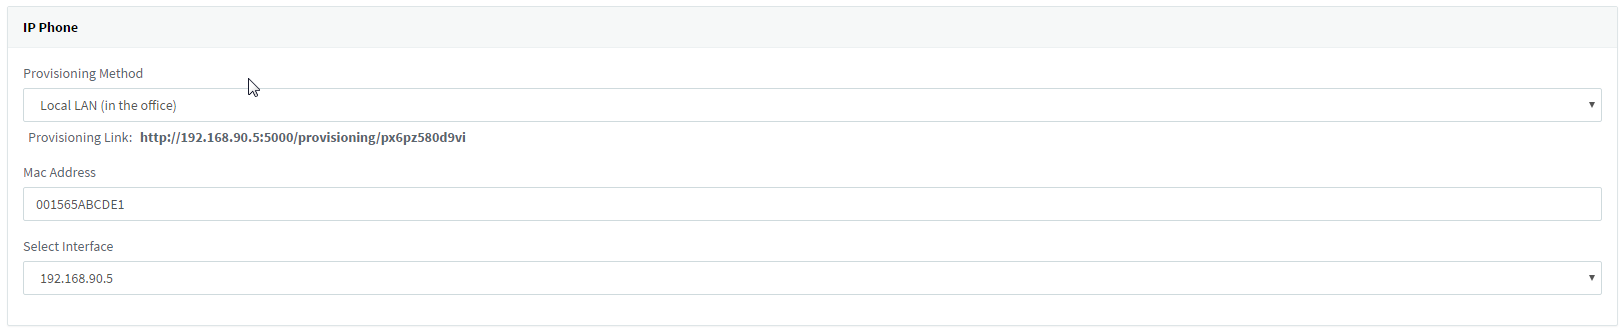
Click OK and a new tab will appear labeled IP Phone. In here you will see the MAC address listed as well as provisioning method. By default, 3CX always selects Local LAN, this is what we are going to need to change.
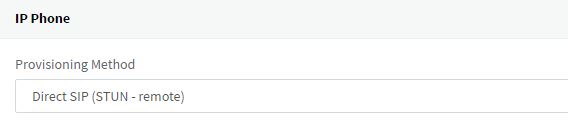
To utilize your phones on a hosted server, you have two options. 1) 3CX SBC and 2) Direct SIP – STUN. Each method have their positives and negatives. In either case, you will need to select which option is right for you. Generally, Direct SIP – STUN will be the common option, however keep in mind that not all phones support it. Finally, before we proceed to the phone, navigate to the options tab in your extension. One big setting that needs to be unchecked is “Disallow use of the extension outside the LAN”.
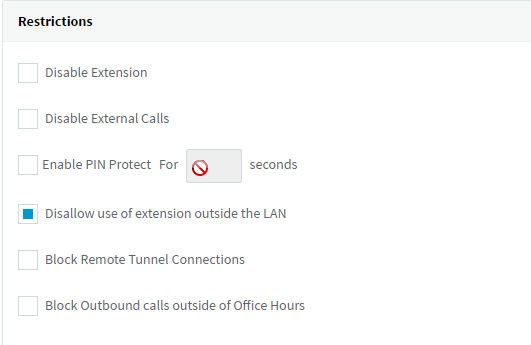
If this is not done, 3CX will not allow your remote phones to register back to the system, and could lead to them being blacklisted by the system itself. Once that is complete, you are done with the required 3CX setup in order to provision your phones.
Phone Set-Up Guide: With remote phones, there is some setup that needs to be done on the phones themselves. In this guide, we will be using Yealink phones as an example. If you need information on provisioning other SIP phones, 3CX’s website has a list of what is supported. In 3CX V15, if your phones are on the latest firmware (in the case of most phones, this would be xx.80.0.130), you can simply plug the phone in, once it is tied to an extension, it will make an RPS request out to your server and prompt you for a Username and Password. In this case, the username is your extensions extension, and the password is that extensions voicemail pin number. Enter both of these and click OK and the phone will reach out and grab it’s configuration and reboot. In the instance that you have a Yealink device that is not on the latest firmware, you can either a) upgrade it to that firmware in order to provision this way, or b) log in to the web interface of the phone and drop the provisioning URL in the device. To do method B, log in to the web interface and navigate to settings à auto provision and you will see an option called Server URL.
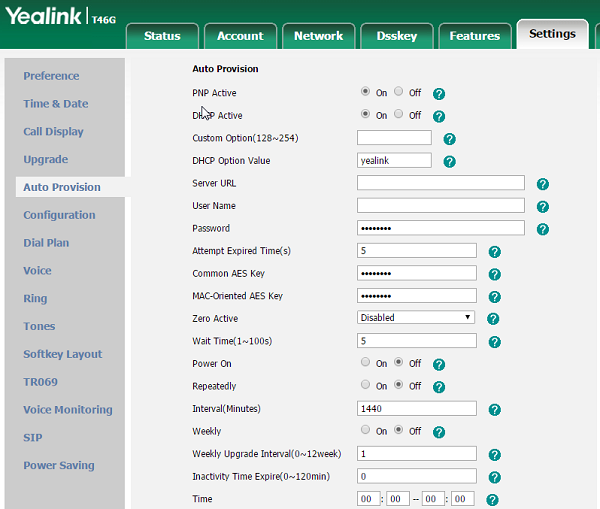
Here you will want to paste the provisioning URL that 3CX provided to you and confirm the change. Once that change is confirmed you can click auto-provision now and the phone will reach out and grab it’s configuration.
Steve Stoveld
Comments