Overview:
An Edgewater Edgemarc SBC can be deployed to utilize with remote devices. An Edgewater SBC allows you to register all devices locally to the Edgemarc which itself then registers back to your hosted server. This allows you to keep local calls on your end and provides a reliable hardware oriented connection back to your hosted server, allowing you to minimalize risk of downtime. In this guide we will cover the basic setup of connecting an Edgewater Edgemarc SBC back to your hosted server as well as the process of registering one phone to the Edgewater Edgemarc SBC.
Process:
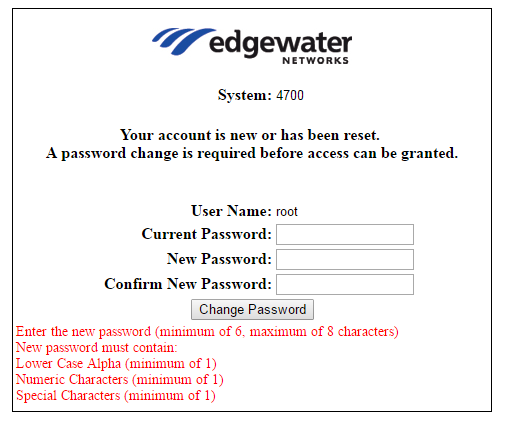
First, the Edgemarc is not a dedicated router, but has routing functionality. You will need to place the device in a location that allows it a WAN connection. Depending upon your situation, this could be behind another router or directly connected to your modem. Once you have the device in place, you will need to first connect a device to one of the LAN ports on the device. By default, the Edgemarc will be accessible at the IP 192.168.1.1. To log in for the first time, the username is root and the password is default.

Upon logging in for the first time you will be prompted to create a new password. The requirements are shown and this will become your new root user password so make sure you keep track of it or you will have to reset the device.
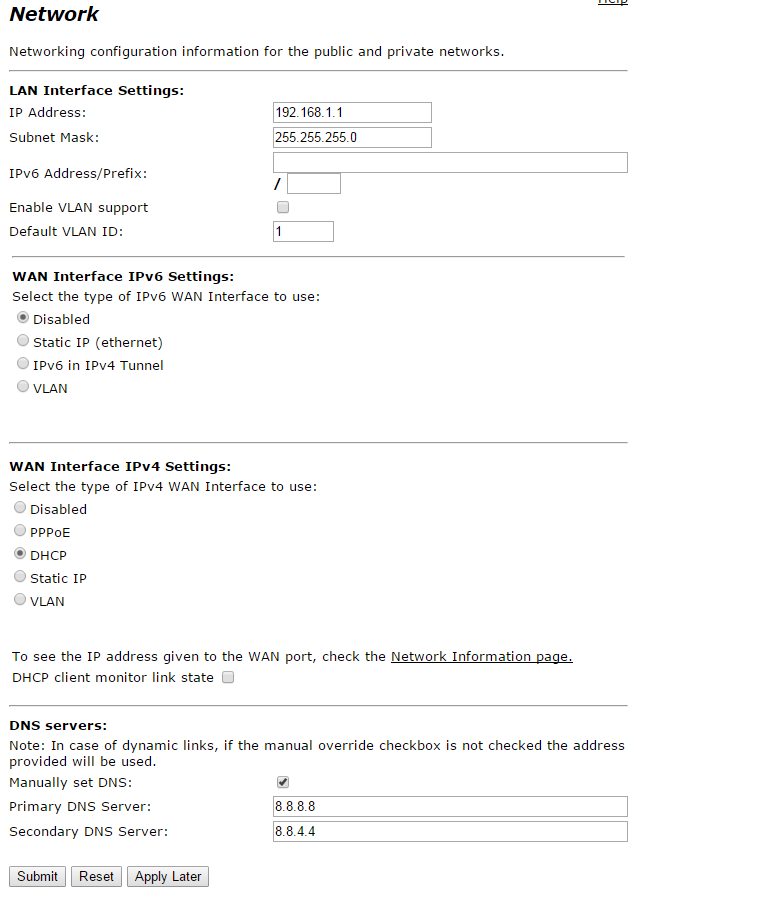
Once logged in you will first want to navigate to the network tab. In order to establish network connectivity, you will either need to define the static IP that the box will be utilizing or you can set it to DHCP and allow your router to assign it an IP. Go ahead and submit your settings and you should have network access on the device you are currently using.
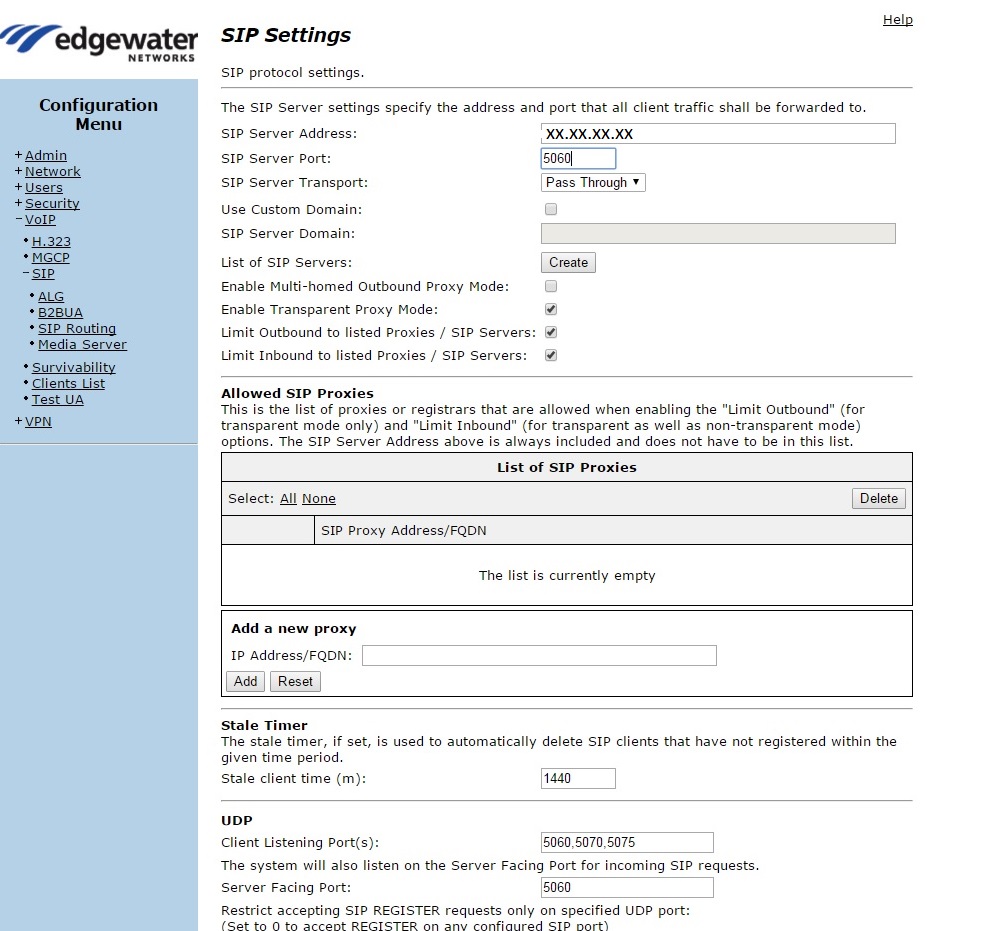
Once completed, please navigate to VoIP --> SIP. You will need to define your SIP server's IP address as well as port. By default with a Cloud Co Server this will be [23.90.(72/82).xx] and the port will always be 5060. Finally, look for the setting labeled "Enable Transparent Proxy Mode", you will need to select this. Once complete, you are done on the Edgemarc side, there are other settings that you can configure, but this guide will not be covering those.
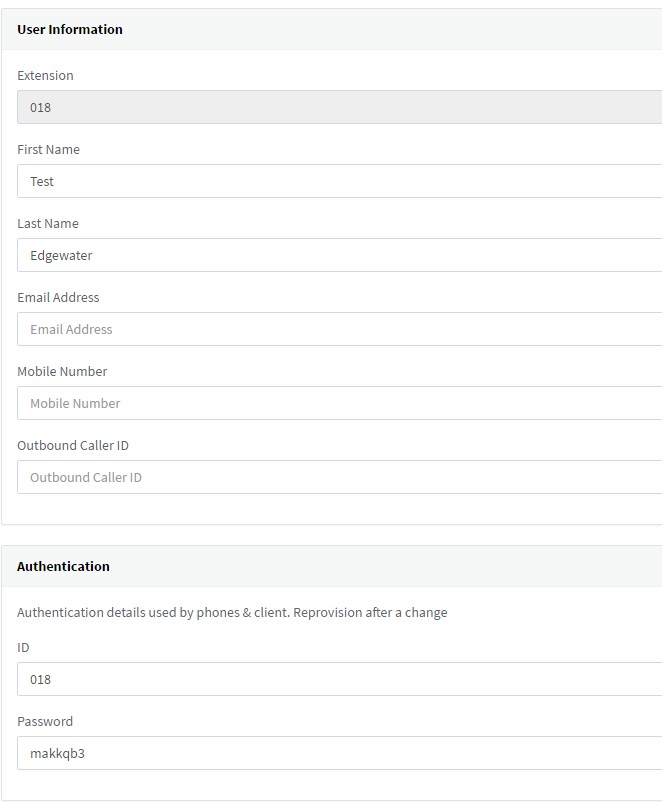
Next, let's proceed back to your 3CX Management console. You will need to create an extension.
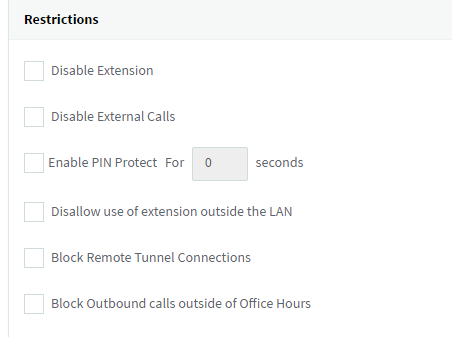
Please note that while utilizing an Edgewater SBC you will not be able to use the "3CX SBC" auto provisioning template to configure your device. (this template may work, but feature results can vary) This will require you to manually configure your phones. We will be keeping the settings simple, just make note that you will need to uncheck the "disallow use of extension outside the LAN" settings that can be found under the options tab for your extension.
Once complete navigate to the web interface of your phone. In our example we are using a Yealink device, but these settings will be fairly similar across most SIP devices. The basic settings that will need to be defined are register name, user name and password. These are your extension, auth ID and password respectively from the extension view in 3CX. Finally, you will just need to set the server host to the LAN IP of the Edgemarc SBC. Go ahead and confirm your settings and your device will be registered via the Edgemarc SBC.

Please remember, this is the basic configuration of getting an Edgemarc SBC up and running. There are many more things that you can do that will not be covered in this guide.
Steve Stoveld
Comments