This article describes how to create your own Vodia PBX instance using CloudCo Partner's IaaS service
For more information on Vodia PBX, please visit this link.
Download a PDF guide for this article
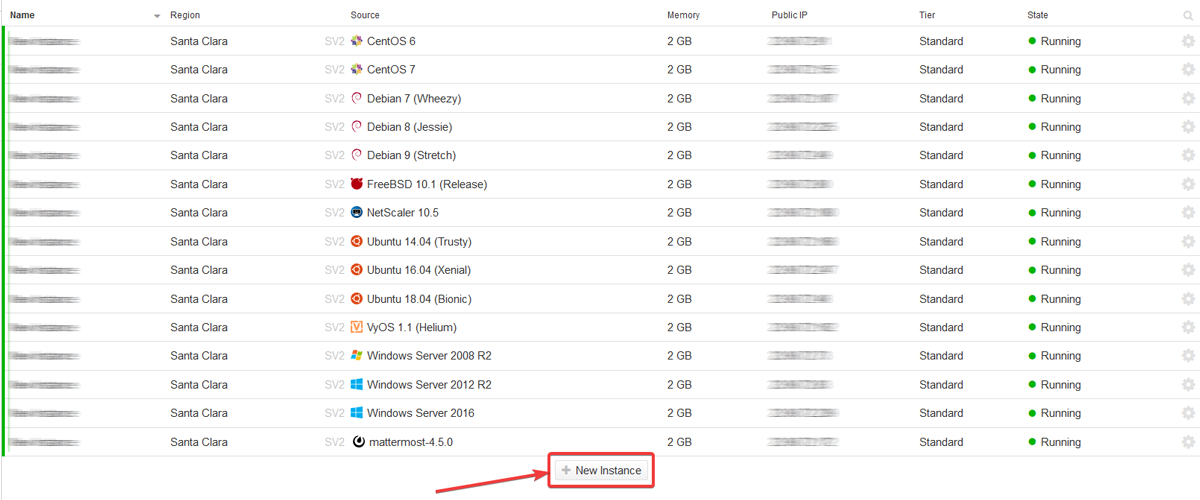
- In the organization view, make sure you are on the Instances view, then select 'New Instance
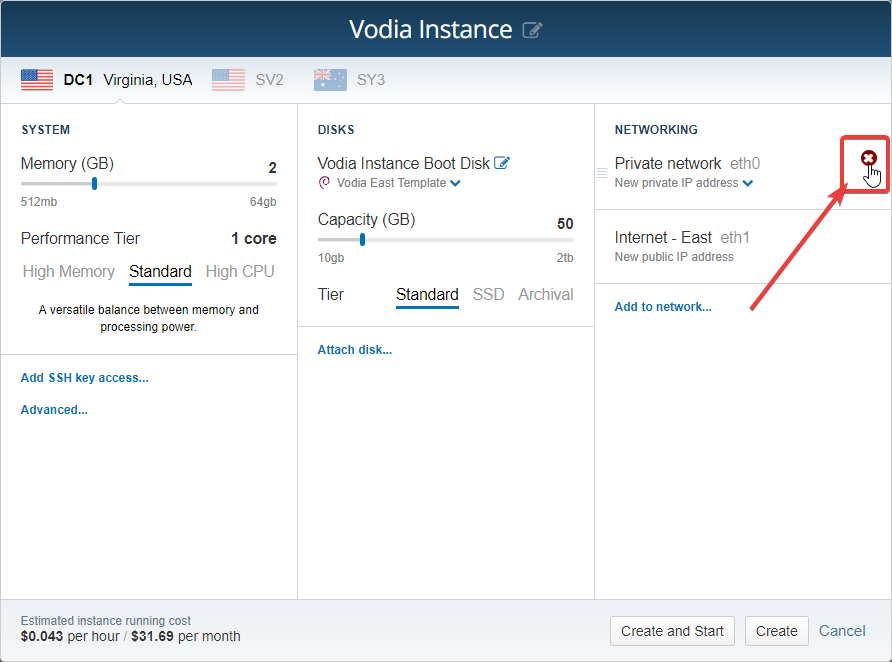
- In the configure dialog, set the desired system memory, cores, and performance tier.
Select the region you want to run this instance in
Select the template chooser under the disk name and select 'Vodia East Template' (or whatever region you choose)* and set the desired drive capacity
Remove the Private network by clicking the 'x' when hovering over it. We only need the WAN connection
- Now we need to SSH into the instance. Use your favorite SSH client and connect to your server. The server IP is listed on the 'Instances' screen under the Public IP column.
Default Username: vodiauser
Default Password: vodiauser

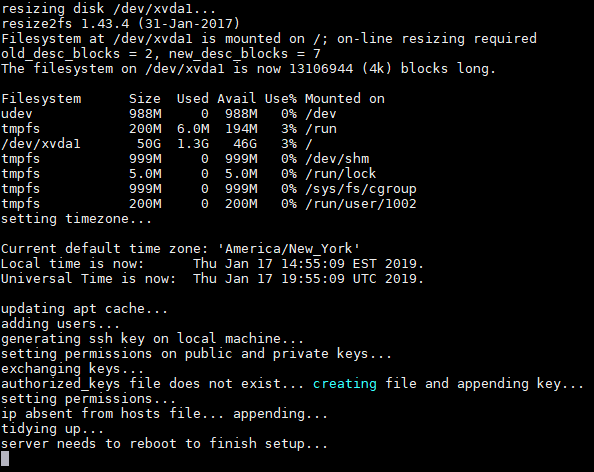
- After logging in, the server will automatically start the build process. The only user intervention required is to set the timezone. Select your desired timezone from the list.
The script should prompt you to choose a new password for the vodiauser user. Please enter a new password when prompted
Please allow the script to finish. Once finished, the server should automatically reboot. Wait a few minutes for the server to come back up.
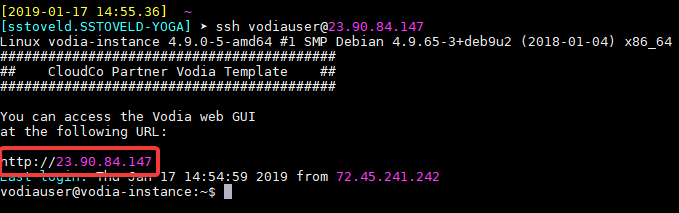
- Once the server is back up and running, SSH back in with the default user and the new password you set. You should see the address of the Vodia GUI in the console.
Open up your web browser and navigate to this address.
- You should be able to access the Vodia web GUI from the address in the previous step. Confirm you have access and attempt to log in.
Username: admin
Password: <blank>

Steve Stoveld
Comments